A Guide To Using Your E-Nail

Now that it's become apparent just how revolutionary the e-nail has become for the world of dabbing and you know all of the benefits of ditching the torch and switching to e-nails for your concentrate consumption, here at E-Nails, we want to make it crystal clear how to go about using one of our e-rigs for the best flavor and experience.
HOW TO USE YOUR E-NAIL
Step 1: Choose Your Preferred Nail
The type of nail that you use can dramatically impact the performance you get out your e-nail attachment:
Quartz - Quartz nails give you a much faster heat-up time for those situations where you need to dab ASAP.
Ceramic - Ceramic nails are designed to retain heat, meaning that you'll get a much longer dabbing session out of each use and won’t require as much power to keep your e-rig heated to the optimal temperature. This is ideal for group dab sessions where you want to keep the party going as long as possible.
Titanium - Titanium nails are much more durable and long-lasting, making them the most pragmatic choice for your e-nail endeavors. They give you a good balance between a quick heat up time and session length, making them sort of a "jack of all trades."
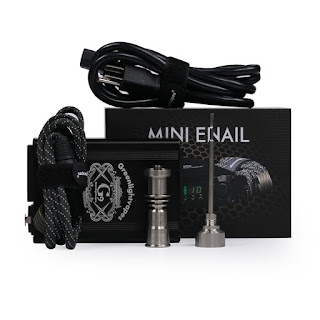
MiniNail E-Nail (Black)
Whether you purchased a E-Nails set that came with a nail for using with your e-nail or you have your own dab nail that has been your go-to on other dab rig setups, you’ll want to begin with unscrewing all three pieces of your nail. From here, you will want to slide the heating coil element of your e-nail onto the top component of your dab nail and then screw it into the center piece (Heat Sink) of the nail to hold it in place and prevent the adapter from getting too warm and cracking your glass. Next, take your adapter (bottom piece) and screw it together to allow your nail to attach to your e-rig.
Step 2: Connect Your E-Nail Control Unit To A Power Source
Find a reliable wall outlet for plugging in your e-rig’s XLR cable that will provide a consistent power source. Bee-Nails e-rigs and their battery boxes will last for thousands of hours if used correctly and given ample power to properly function.
Warning: When plugging in your XLR cable, do not press the “Push” button. The cable will click into place when it is secure. When disassembling the XLR cable, gently press the “Push” button and pull.
Step 3: Power Up and Set Your Temperature
Once you turn on your e-nail, it will take about two minutes to heat up to the temperature that you set. Upon your first use of the Bee-Nails e-nail, it comes pre-programmed to reach an ideal temperature of 710 degrees, which we have determined to provide the optimal dabbing experience.
If you decide you prefer your e-nail at different temperature levels, no worries! You can easily increase or decrease the temperature of your e-rig with the up and down arrows located on the digital display. If you need to reset your temperature, press and hold the “>” button for five seconds until the “out” light begins to flash quickly. Wait three to five minutes until the “out” light begins flashing normally.
Once you have your ideal temperature set, you are ready to season your nail and dab away just as you would with your traditional dab rig setup — just without that pesky butane torch making things a hassle.

评论
发表评论